
How To Create A Fancy Looking Cake with Easy Piping
I recently did an Instagram Live for Mom 2.0 Summit on how to decorate a cake. Did I mention this was live? I had never done something like that before so I was a little like, “Hmm, will I totally bomb this thing?” but I also love the raw fun of livestreaming so I figured, why not? Here’s the broadcast (posted to my personal YouTube account with permission from Mom 2.0 Summit).
In the broadcast I share how to stack and crumb coat a cake, and then the really fun part was to show how to pipe a cake in a way that looks fancy but isn’t difficult...you literally just need to be able to squeeze a piping bag! Smoke and mirrors FTW! I wanted to detail out that process in pictorial format. But first, let me give you basic recommendations for the cake making part:
- Cake: these simple vanilla and Devil’s food cakes are in my go-to arsenal (or if you have a box mix brand you love, use a box mix)
- Buttercream: you only need 3 ingredients for this basic buttercream
- Cake tools: You can use whatever pans you have but I love 6-inch cake pans because it’s a more reasonable cake size when you’re not entertaining for a crowd (as we are most definitely not right now) + I love small and tall cakes! I also use this amazing Ateco cake turntable + this bench scraper for smoothing the pre-piped cake.
For this cake I wanted to go with an Easter theme but you could do this in any colorway. Here are the basic recommendations for the decorating part:
- Food coloring: use gel food coloring instead of liquid if possible
- Piping bags: I use disposable piping bags and wash and reuse them to extend their lives
- Piping tips: The key is to have a variety (at least 2 of each) of large and small piping tips
- Couplers: Large and small couplers allow you to change your piping tips whenever you want, using the same bag of frosting
You can use this technique with a single color, in which case you will just need two piping bags, one fit with a large coupler and the other fit with a small coupler. In my live demo I wanted to create an Easter theme using multiple colors. I decided to use purple as my large tip bag and the other 3 colors (green, pink, yellow) with small tip bags.
The beauty of this approach is that literally, all you need to be able to do is squeeze a piping bag. It looks fancy but it’s not hard! OK, now here’s the step by step!
1. Use your large piping tip to create anchors
Use your large piping tip to pipe all around your cake at random. I decided to use purple as the anchor color in the large tip bag because it’s the boldest shade, plus it’s a symbolic Easter color. Part-way through, switch to a different large tip; this adds dimension! At a minimum, I recommend using two different large tips, but you’re welcome to use more.

Use large piping tips to create anchors around your cake
2. Use small piping bag #1 to start building
Go around with your second color; you can pipe sporadically but I like to start by nesting the second color next to the big anchor piping to start building things up.

Start building on color with a smaller tip
3. Use small piping bag #2
Go around with your third color, using a different kind of tip than you did with piping bag #1 to create additional dimension (beyond color).
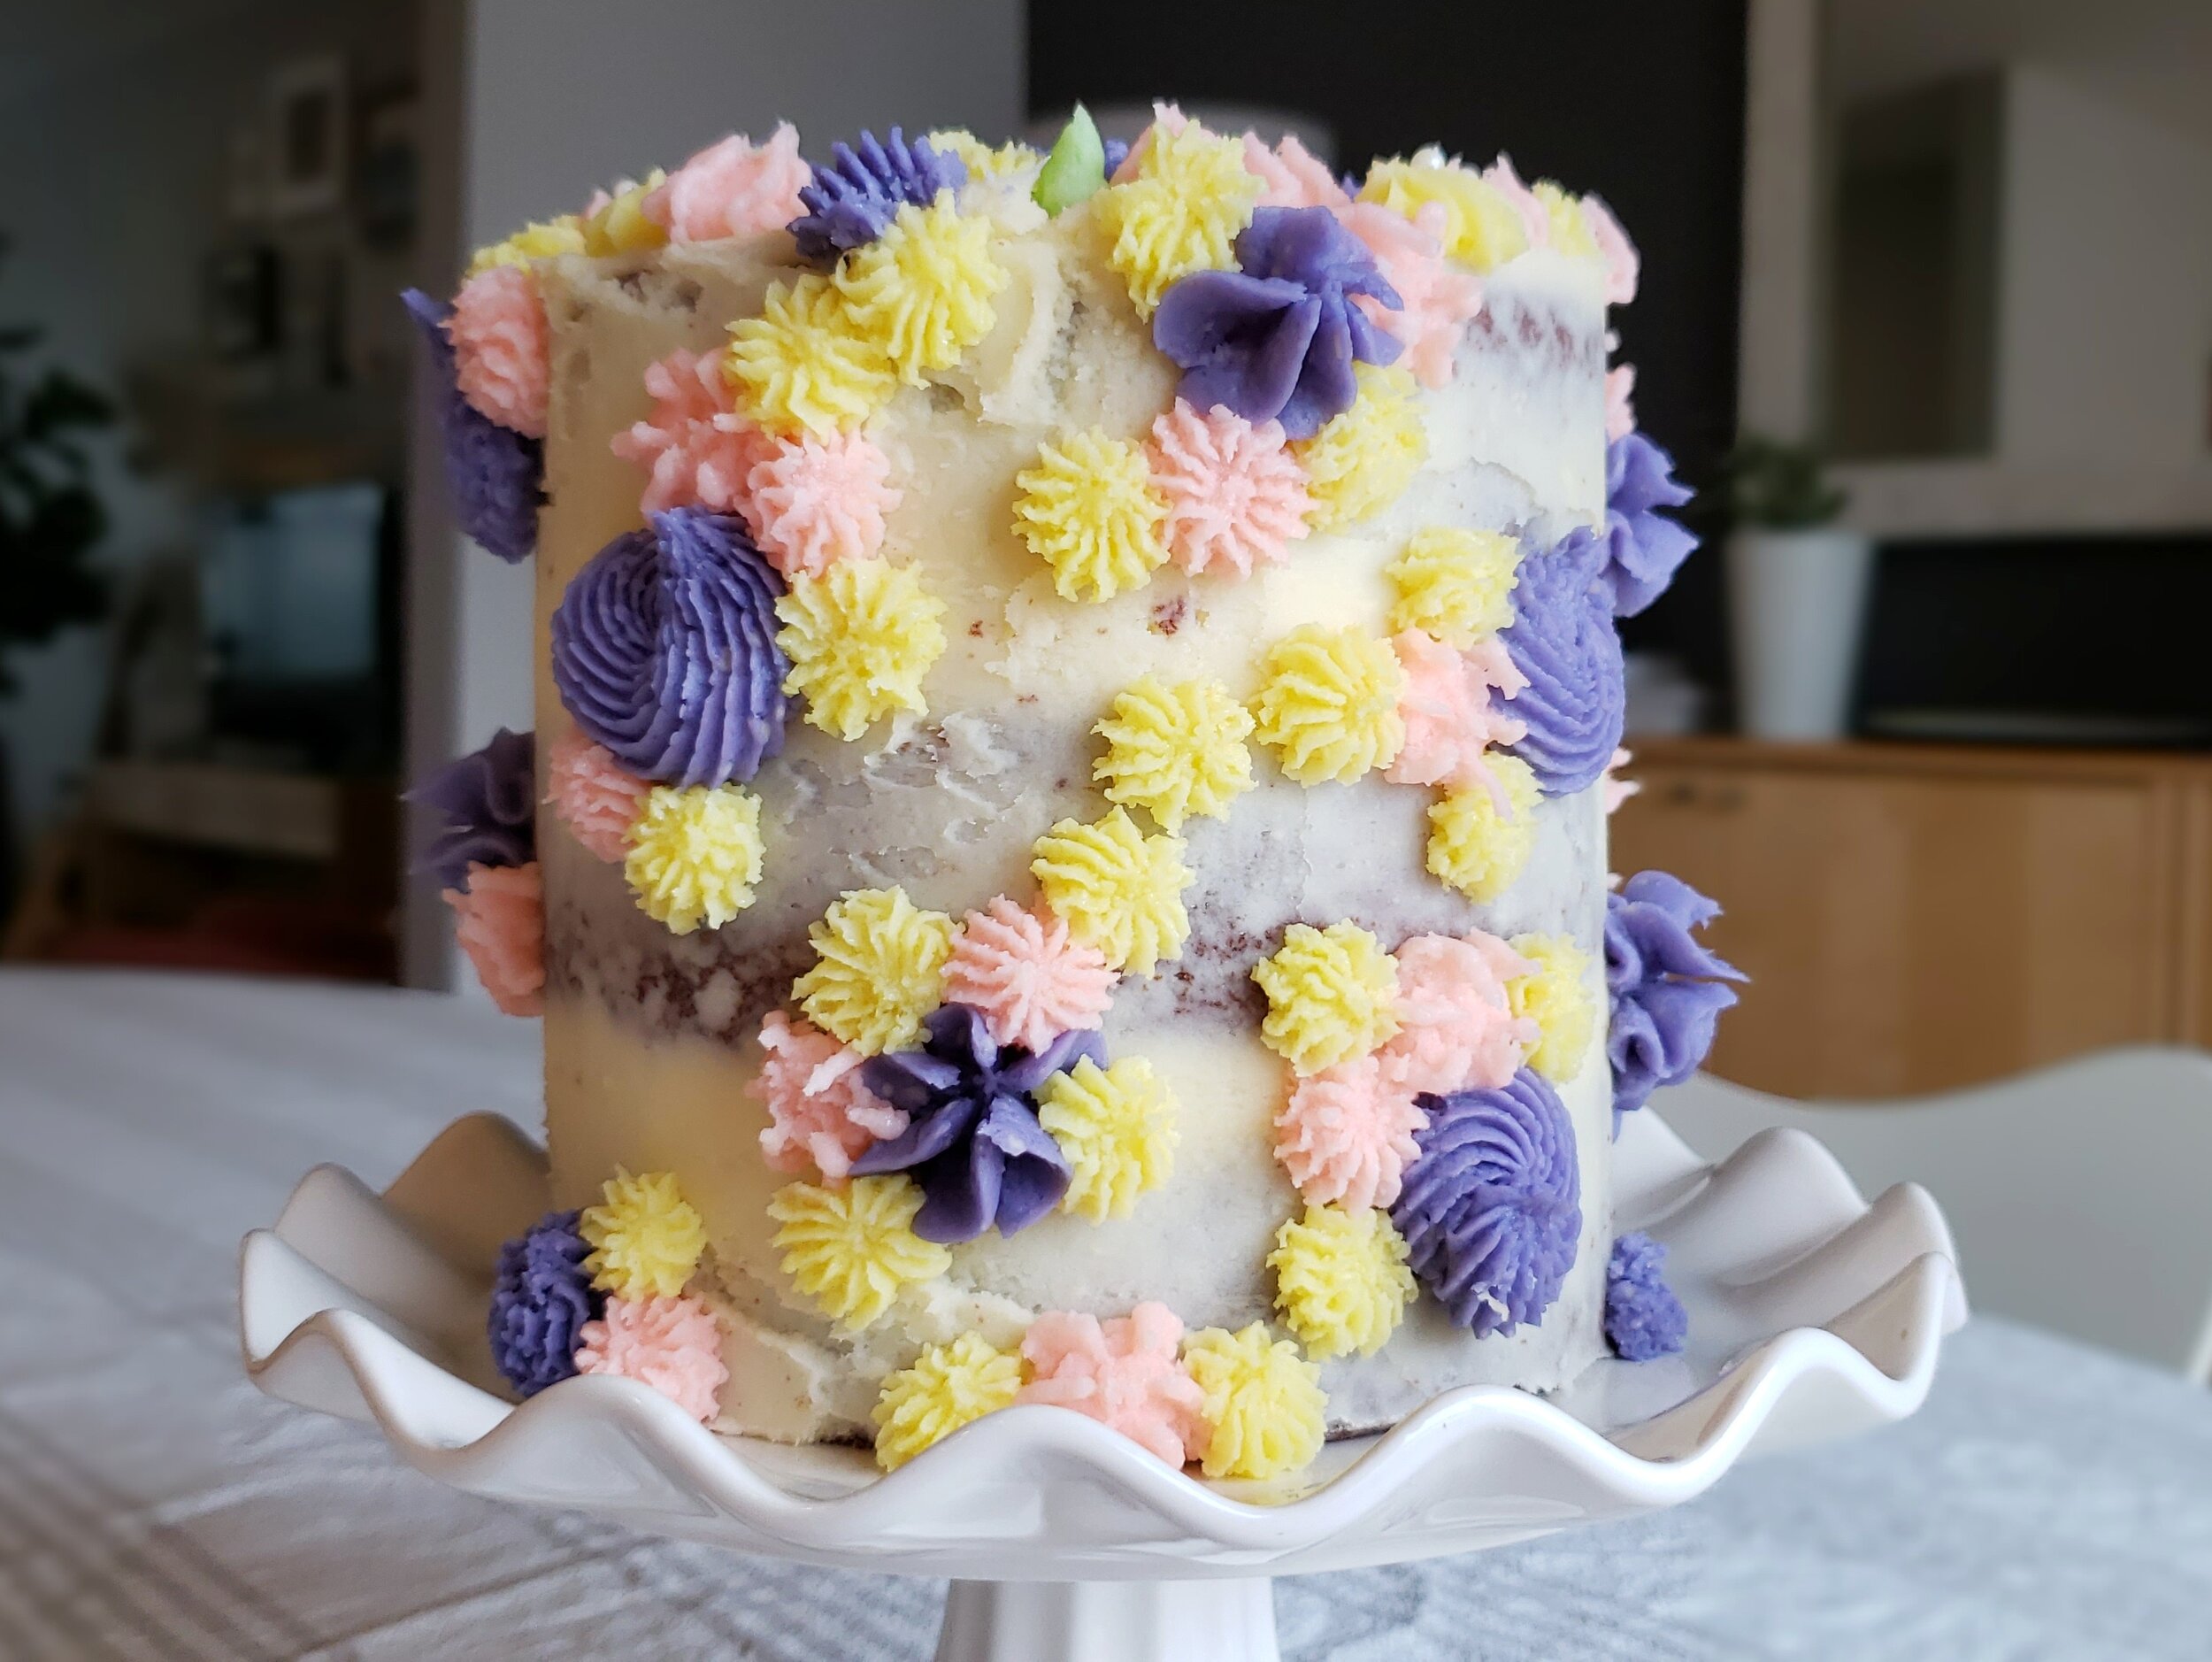
Continue to fill in color, building on your anchors
4. Use small piping bag #3
Go around with your fourth color. As a counterpoint to the star/flower type tips, I always like including a simple circle tip as you’ll see with the green circles below. Again, the point is to create dimension!

Add dimension with different piping tips
5. FILL IN THE GAPS
Now, go around with your piping bags and fill in the gaps at random until your cake is covered!
6. Optional: Add candy!
If you want to add further dimension to your cake (this would be especially good if you are using this technique with a single-color cake), add candy! The white and gold pearls in this white/gold Wilton sprinkles set I had on hand felt like the perfect fancy touch. Again, you just need to add the sporadically! Below is a close up so you can see the pearls and then a shot so you can see the final product, with Cadbury mini eggs!
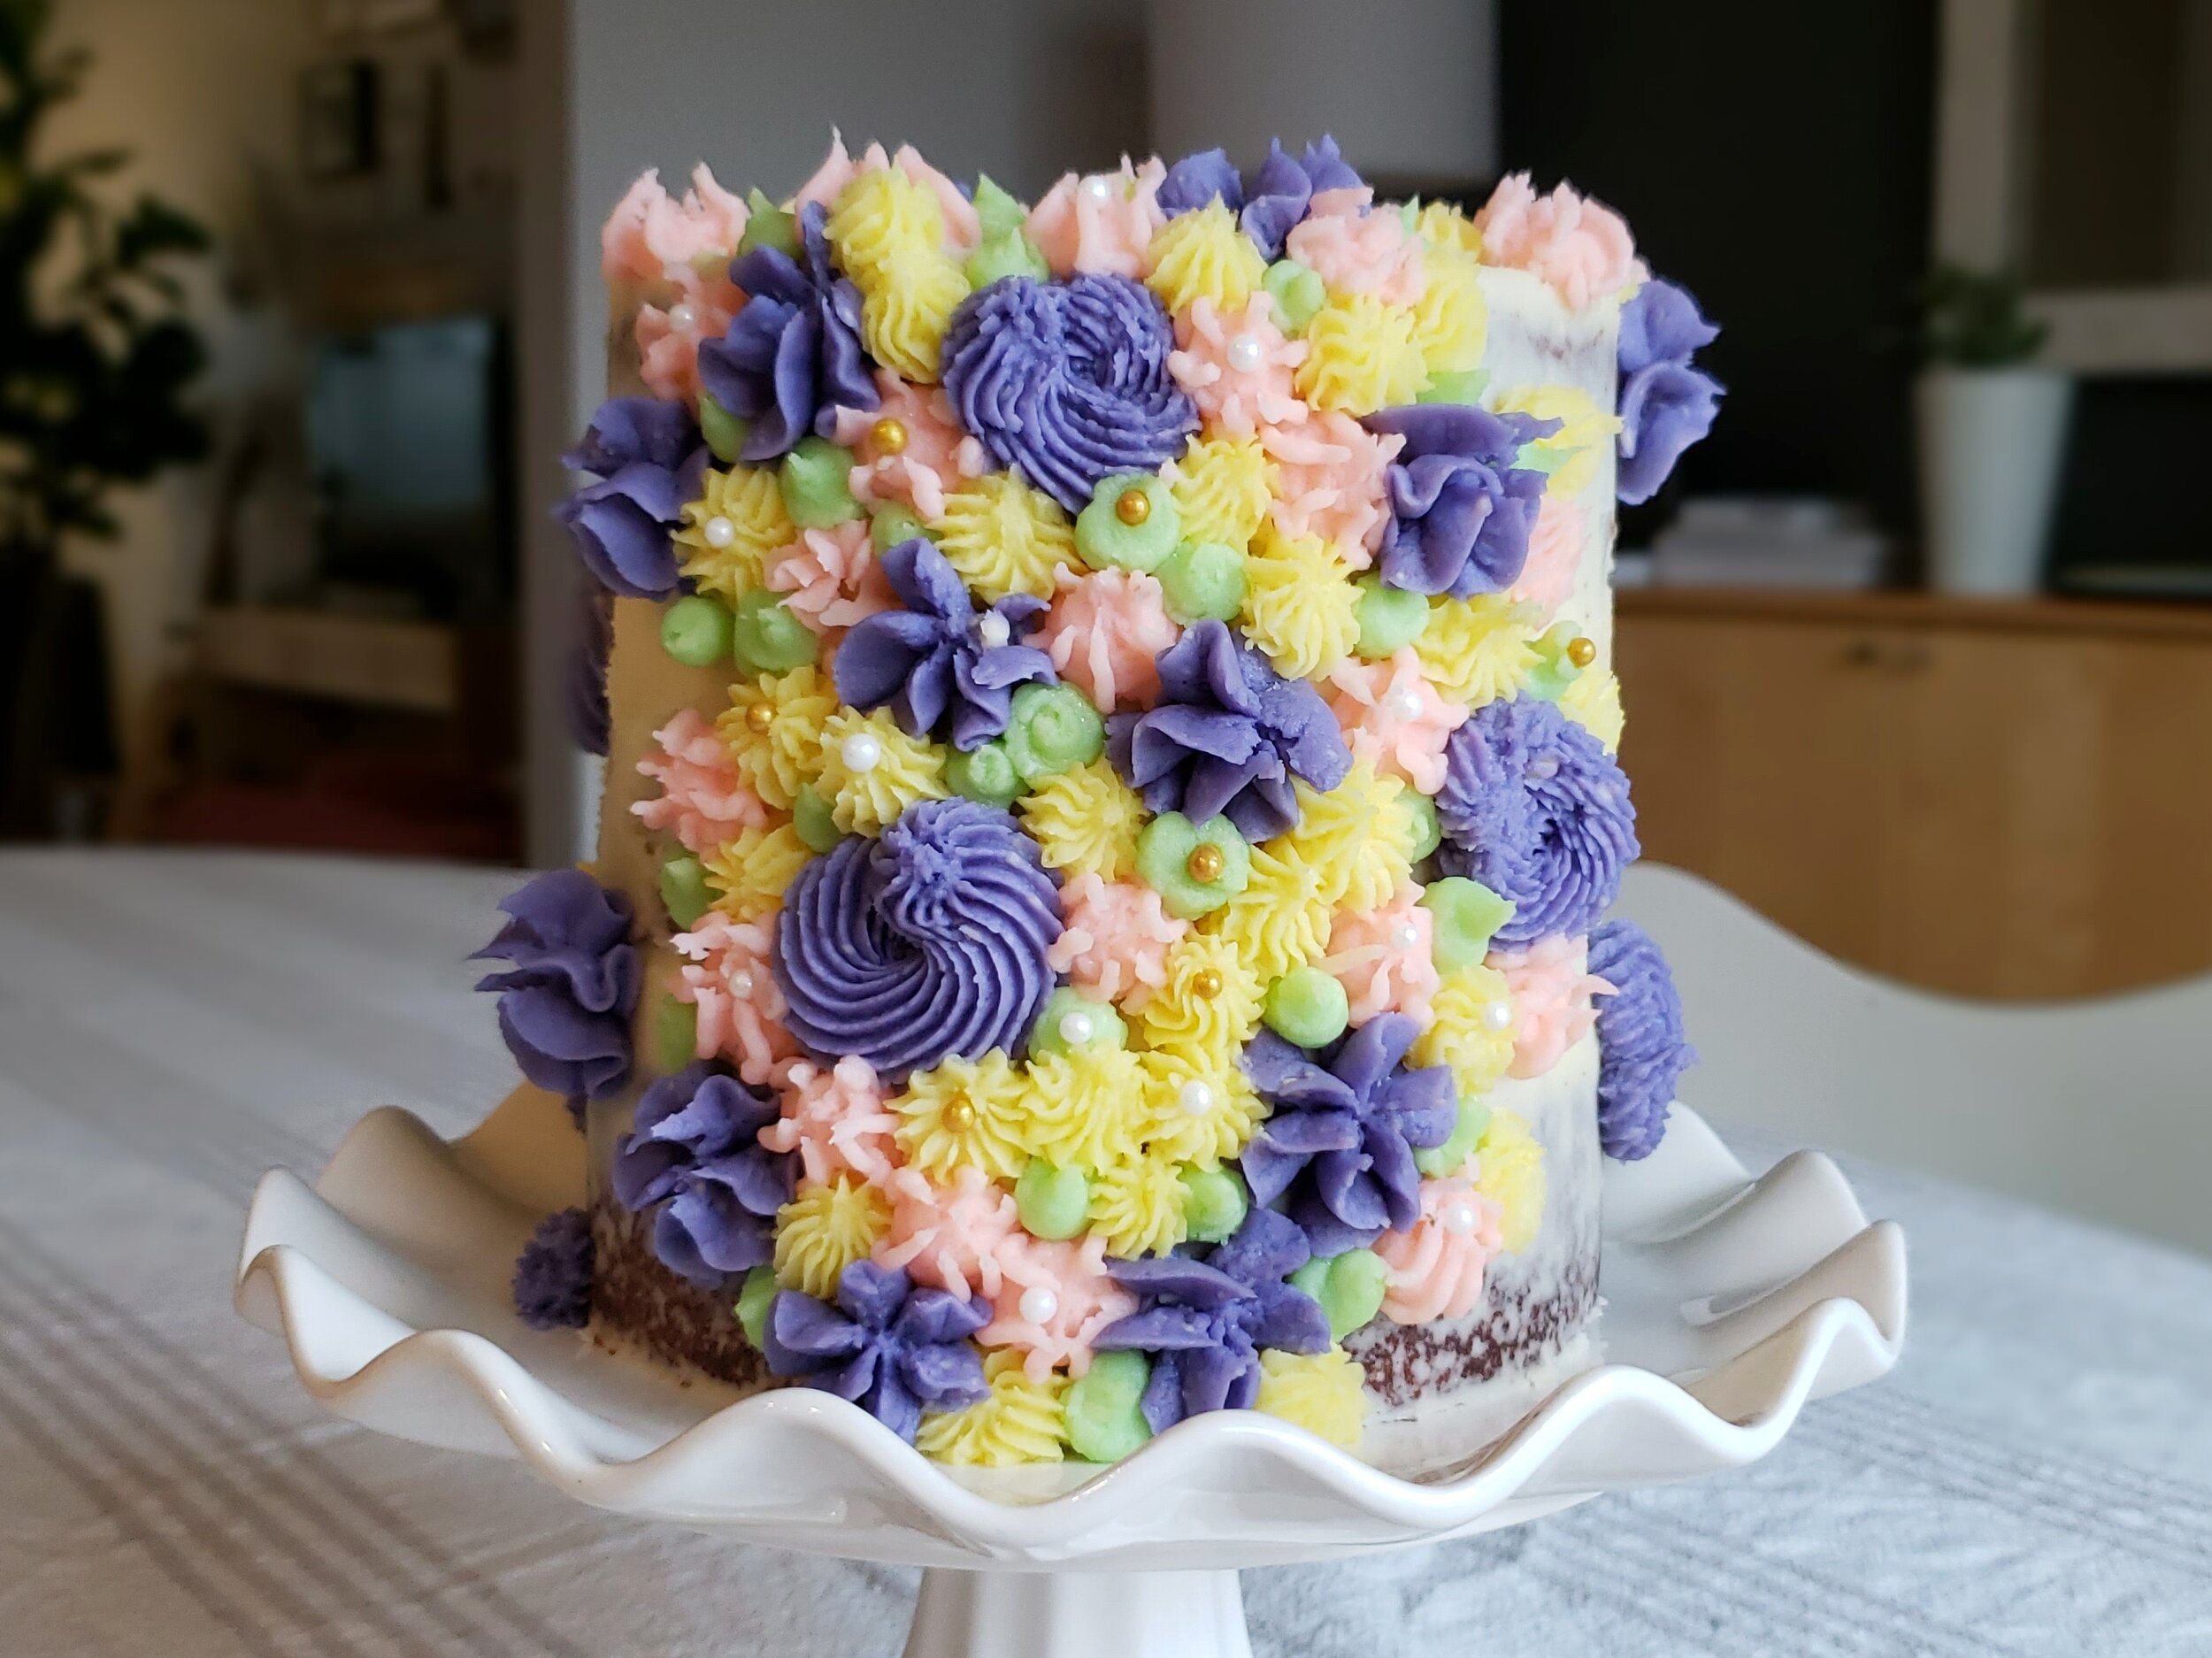
Small candy pearls add sparkle!

Cadbury mini eggs are a perfect finishing touch for an Easter cake
How fun is that? Seriously, do you can do this in less colors and it will look amazing. Do what is most fun for you! Happy piping bag squeezing!

Create a fancy looking cake by varying piping tips!

Easter cake decorating demo