
Perfectly Petite Treats
 Before baking becomes seasonally obsolete, I wanted to share a project that Laurel and I have had tremendous fun with: thumbprint cookies. This project is great for parents because the cookie dough is really easy to make (especially if you have a standing mixer), the thumbprint and jelly filling steps are fun for kids (plus, think manual dexterity practice), and it’s nice that the end result – particularly in our world of super size – is a perfectly petite treat.
The impetus for making these cookies was a corporate jelly sampler we had kicking around the pantry. Laurel loved the little colorful jars and it was fun to use different jellies across the batch. But go ahead and use whatever you have in your fridge. And there’s no need to strain the jelly, as some jelly cookie recipes suggest. (Click photo thumbnails to enlarge all images.)
The Dough
 My go-to butter cookie dough recipe is from a fabulous feature Gourmet ran in December 1995 (one basic butter cookie dough recipe x 9 cookie variations). Unfortunately, the recipe isn’t online at Gourmet or Epicurious, so here it is, with the process modified a bit + additional commentary:
You will need*:
1. Preheat oven to 350 degrees. In the bowl of a standing mixer, beat butter, sugar, and salt until light and fluffy. Add egg yolks and vanilla and beat until smooth. Beat in flour gradually, until just combined (do not overbeat, or it will toughen the dough).
2. Form balls of dough about ¾ inch in diameter and arrange one inch apart on a cookie sheet. I use nonstick or a traditional baking sheet with a Silpat mat.
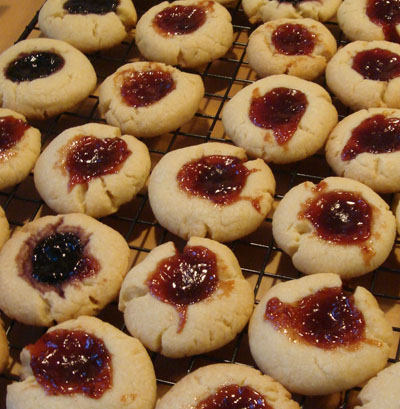
3. As you lay out the balls of dough, have your child use his/her thumb to make a thumbprint in the center of the cookie. Perfection is not necessary! I actually found that the cookies that came out all smooshed (Laurel liked to “fix” some of the cookies by squeezing the sides a little after she made the thumbprint - see second photo above) were especially cute and heartfelt.
4. If your child has decent utensil control, have them use two spoons (one to scoop the jelly from the jar, the other to push it off the first spoon and into the thumbprint) to fill the cookies. Little kid spoons work great, or Laurel also liked using our tapered grapefruit spoons. Again, don’t worry about them looking perfect!
5. Bake in preheated oven until cookie edges are light golden, about 10-14 minutes depending on your oven.
*Note: It’s easy to halve this recipe if you don’t want to make the full yield of about 80 cookies. Alternatively, you can bake the full batch and freeze half the dough for later use, or bake all the cookies and store extras between layers of wax paper in an airtight container up to 6 weeks in the freezer.